
KwickAcademy Course Topics · 6 min · free
Running and printing a slide show
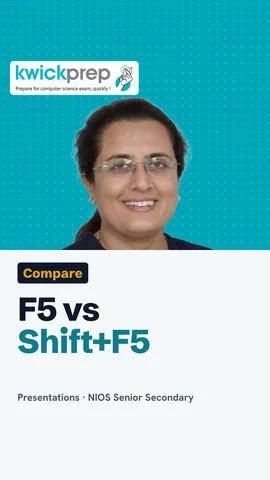
F5 starts a slide show from slide 1 and Shift+F5 from the current slide. Print slides, notes pages, handouts or an outline.
Follows the syllabus of: NIOS Senior Secondary Data Entry Operations (336)
On screen in this lesson
What is a slide show?
| Slides fill the whole screen |
| Menus and toolbars are hidden |
| The speaker moves slide by slide |
| Used on a projector or a big TV |
Starting the show
| Start from | Key | Menu |
|---|---|---|
| First slide | F5 | From Beginning |
| Current slide | Shift+F5 | From Current Slide |
Moving during the show
| Action | Keys | Mouse |
|---|---|---|
| Next slide | Right arrow, Space | left click |
| Previous slide | Left arrow | right-click menu |
| Go to slide 5 | type 5, Enter | Go to Slide |
| Black screen | B | right-click menu |
| End the show | Esc | End Show |
Rehearse timings
| Rehearse Timings records time per slide |
| Speak as if the audience is present |
| Save the timings at the end |
| Slides then move on by themselves |
Set up the show
| Presented by a speaker: full screen |
| Browsed at a kiosk: loops on its own |
| Show only some slides |
| Loop until Esc is pressed |
Hide a slide and speaker notes
| Hide Slide: skipped in the show, kept in file |
| Speaker notes: hints typed under a slide |
| Presenter view: notes on laptop, slide on screen |
Quick answers
18 slides printed as handouts, 6 per page. How many pages?
3 pages.
Which key blacks out the screen during a show?
B.
KwickClips from this lesson
Short clips, one idea each. Good for revision the night before.
The full lesson, in text
Hello students, welcome to Kwickprep. Your slides are ready, and the class is waiting. How do you start the show, move through it, and stop it smoothly? Today we will learn to run a slide show, and to print slides, notes and handouts.
First, what is a slide show? It is the view where each slide fills the whole screen. All menus and toolbars are hidden, so the audience sees only your slide. The speaker moves forward one slide at a time. It is used with a projector in a classroom, or a big TV in a meeting.
There are two common ways to start. To start from the first slide, press F5, or choose From Beginning. To start from the slide you are working on, press Shift+F5, or choose From Current Slide. In PowerPoint these are on the Slide Show tab, and in LibreOffice Impress they are in the Slide Show menu.
Once the show runs, you control it with keys or the mouse. To go to the next slide, press the right arrow or Space, or left click. To go back, press the left arrow. To jump to slide five, type five and press Enter. Press B to make the screen black, when you want students to look at you. Press Escape to end the show.
Before a big event, you can rehearse. Rehearse Timings records how many seconds you spend on each slide. Speak your lines aloud, just as you would in front of the audience. At the end, the program asks whether to save these timings. If you save them, the slides move forward by themselves in the real show.
The Set Up Slide Show options decide how the show behaves. Presented by a speaker is the normal full screen show. A kiosk is a stand-alone screen, for example at a school exhibition, where the show runs on its own. You can choose to show only a range of slides. You can also make the show loop again and again until someone presses Escape.
Two more useful tools. Hide Slide skips a slide during the show, but the slide stays safely in the file. Speaker notes are hints you type in the notes area below a slide. Presenter view shows these notes and a timer on your laptop, while the projector shows only the slide.
Now, printing. Why print at all? Handouts give the audience a paper copy to take home. Notes pages help the speaker, because each page shows a slide with its notes. A paper copy is easier for checking spelling mistakes. And a printed copy is useful for a school project file.
There are four things you can print. Full page slides print one big slide on each page. Notes pages print a small slide with its speaker notes below. Handouts put one, two, three, four, six or nine slides on one page. PowerPoint's three slides handout adds lines beside each slide for writing. An outline prints only the titles and text, without pictures.
Here are the steps to print. First, press Ctrl+P, or open File and then Print. Choose the printer. Choose the slides, such as all slides or only slides two to five. Pick what to print, like full slides, handouts or notes pages. Set the number of copies, and colour or grayscale. Finally, click Print.
A smart operator saves paper and ink. Grayscale prints in shades of grey, which saves costly colour ink. Handouts with six or nine slides use far fewer sheets. Print only the range of slides you need. And always check the print preview first, so you catch mistakes before printing.
Pause and predict. Your presentation has eighteen slides. You print handouts with six slides on each page. How many pages will the printer give? Eighteen divided by six is three, so you get three pages.
Let us revise. F5 starts the show from the first slide. Shift+F5 starts from the current slide. Arrow keys move between slides, B blacks the screen, and Escape ends the show. You can print full slides, notes pages, handouts or an outline. To print, press Ctrl+P, then pick the range, layout, copies and colour.
Courses that teach this
| Course | Unit |
|---|---|
| NIOS Senior Secondary Data Entry Operations (336) | Lesson 9: Creating Presentation |
Free to watch, no sign-up. The live classes are the paid course; these lessons stay free either way.
Disclaimer. KwickAcademy is free study material for general learning and revision. Parts of it, including the voice-over, are produced with the help of AI tools and may contain errors; if you spot one, please tell us and we will correct it. Syllabus, marks and exam details follow the latest official board publications available to us, and boards can change them at any time, so always confirm against your board's official website and your school. Using this material does not guarantee any marks or result. Board names and trademarks belong to their owners; Kwickprep is not affiliated with or endorsed by any examination board. We never ask for passwords, OTPs or ID numbers. Your progress is saved only in this browser. Full disclaimer · Privacy