

KwickAcademy Course Topics · 5 min · free
Merging data into the main document
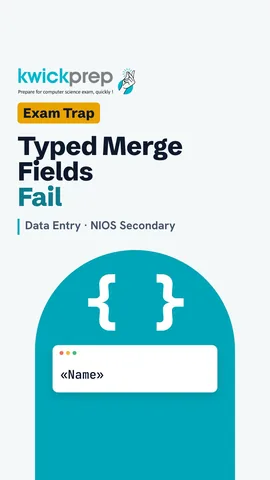
Use Insert Merge Field to place «FirstName» and other fields, check with Preview Results, then Finish & Merge. Never type the « » brackets yourself.
Follows the syllabus of: NIOS Secondary Data Entry Operations (229)
On screen in this lesson
Before you merge
| Main document open, type chosen |
| Data source connected with Select Recipients |
| Merge field buttons are now active |
Insert Merge Field
| Click where the detail should appear |
| Mailings, Insert Merge Field, pick the field |
| It shows as «FirstName» in the letter |
| Type spaces and commas outside the field |
How fields change
| Main document | Record | Merged copy |
|---|---|---|
| Dear «FirstName», | Riya | Dear Riya, |
| Class «Class» | 10 | Class 10 |
| Fee due: «Fee» | 4500 | Fee due: 4500 |
Ready-made fields
| Button | Inserts | Example |
|---|---|---|
| Address Block | full address | name, street, city |
| Greeting Line | a salutation | Dear Riya Shah, |
Never type the brackets
| Typed « » is only plain text |
| Word does not fill plain text |
| Always use Insert Merge Field |
Preview Results
| Click Preview Results to see real data |
| Use the arrows to move record by record |
| Find Recipient jumps to one person |
| Check for Errors tests the merge |
Quick answers
40 records, merge From 11 To 20. How many letters?
Ten.
Why does typing « » yourself fail?
It is plain text, so Word does not fill it.
KwickClips from this lesson
Short clips, one idea each. Good for revision the night before.
The full lesson, in text
Hello students, welcome to Kwickprep. Your main document is ready, and your data source is ready. How do the names actually get into the letter? Today we learn to insert merge fields, preview, and complete the merge.
Check three things before merging. The main document is open, and its type, such as letters, is chosen. The data source is connected using Select Recipients. Now the merge field buttons on the Mailings tab become active.
Now we place the fields. Click at the exact spot where a detail should appear. On the Mailings tab, click Insert Merge Field and pick the field name. The field appears inside double angle brackets, like FirstName. Type spaces and commas outside the brackets, never inside them.
Here is how fields change during the merge. Dear FirstName becomes Dear Riya for Riya's record. The class field becomes Class 10. The fee field becomes the amount due for that student.
Word also gives two ready made fields. Address Block inserts a full address in the usual format. Greeting Line inserts a salutation, like Dear Riya Shah, with a comma. If either one shows wrong data, click Match Fields and link your column names to the names Word expects.
Here is a common mistake in practical exams. If you type the angle brackets yourself, it is only plain text. Word does not fill plain text with data, so every copy shows the same words. Always use Insert Merge Field.
Always preview before you finish. Click Preview Results, and the fields show real data. Use the arrow buttons to move through the records one by one. Find Recipient jumps straight to one person's copy. Check for Errors tests the whole merge and reports problems.
Sometimes different people need different sentences. Open Rules on the Mailings tab, and choose If Then Else. For example, if the fee field equals zero, insert Fees paid. Otherwise, insert Please pay your fee. So each copy gets the right sentence automatically.
Now click Finish and Merge, which offers three choices. Edit Individual Documents makes a new merged document that you can check and change. Print Documents sends all copies straight to the printer. Send Email Messages sends one email to each person, using an email address field and Outlook.
After you choose Edit Individual Documents, a small box opens. All merges every record in the list. Current record merges only the record shown in the preview. From and To merges a range, for example records five to ten.
Pause and predict. The list has forty records. You merge from eleven to twenty. How many letters are made? The answer is ten, because both eleven and twenty are included.
Word also has a guided way to do all of this. Click Start Mail Merge, then Step by Step Mail Merge Wizard. It shows six steps in a pane on the right, from choosing the document type to completing the merge. It is helpful when you are new to mail merge.
Finally, save your work the right way. Save the merged file with a new name. Save the main document too, so you can use it again. The main document remembers where its data source is. So do not move or rename the data file, or Word will not find it next time.
Let us revise what we learned today. Use Insert Merge Field, and never type the brackets yourself. Address Block and Greeting Line save time. Preview Results before you finish. Rules give different text to different people. Finish and Merge lets you edit, print or email the copies.
Courses that teach this
| Course | Unit |
|---|---|
| NIOS Secondary Data Entry Operations (229) | 5. Mail Merge |
Free to watch, no sign-up. The live classes are the paid course; these lessons stay free either way.
Disclaimer. KwickAcademy is free study material for general learning and revision. Parts of it, including the voice-over, are produced with the help of AI tools and may contain errors; if you spot one, please tell us and we will correct it. Syllabus, marks and exam details follow the latest official board publications available to us, and boards can change them at any time, so always confirm against your board's official website and your school. Using this material does not guarantee any marks or result. Board names and trademarks belong to their owners; Kwickprep is not affiliated with or endorsed by any examination board. We never ask for passwords, OTPs or ID numbers. Your progress is saved only in this browser. Full disclaimer · Privacy